Now that I've finished the basic assembly of the bench, I have spent the last month or so building up the finishing touches, which was not easy. I have 2 tasks to complete before I can say the bench is done. First, I need to build a planing stop so that I have a basic way to hold boards still while I plane the faces. Second, I need to build my leg vise, which requires gluing up the laminations to make a sufficiently weighty chop, then drilling out the corresponding holes and mortises for the pin board I will be using to prevent racking when clamping material. As usual, this process took me longer that I anticipated.
When I first decided to build this bench, I was most excited to buy all the cool little doodads and widgets that I would eventually put into the bench. The first things I purchased, before even getting the wood, were 2 holdfasts, a planing stop from an American blacksmith on Etsy, and the vise screw for my leg vise. It has been well over a year since making those purchases and I am now, finally, in a place to build the parts required to actually use them. This is a recurring problem for me. I am a habitual cart-first horse-second thinker.
For the planing stop, the work seems simple enough: make a long block of wood that's approximately 12" long, and 2 1/2" square length and width. Trim it and slowly remove material to fit it into the mortise thats been carved into the front-left portion of the bench. Test it's stickiness, that is to say, it's ability to move up and down, with a few whacks from a mallet. Get it to the point where I can hit it a couple of times from the bottom to move it up into position to ram a board into it to hold it in place while I plane it.
However, a few snags. First, I did not remember to follow the instructions in the Anarchist's Workbench plans to cut the mortise out of the boards to be laminated into the benchtop before glue up. If you do it right, you can easily just cross-cut some of the 2x material for the top so that there's a perfect square hole in the bench for the planing stop. I was a fool. I did not do this. My mortise, therefore, had to be cut out after the fact, with some holes drilled with a Wood Owl auger bit, and the remaining bit cut out with a chisel. Cutting a small square hole through 5" of benchtop with a chisel is not fun and I blew out the other side horribly while hammering away, which means I made a complete mess out of the top of the bench (recall that after glue-up, the side of the benchtop facing up is actually the underside once the legs are installed and the bench is flipped over). The hole for the planing stop is disgusting, the wood is not cleanly cut like it should be with sharp tools. Chunks of the fibers were ripped out from me basically hammering an edge as sharp as a dinner plate through the material.
Second, Christopher Schwarz says to make 2 blocks for the planing stop because first-timers have a tendency to split the first attempt. For some reason, I just assumed I would suffer a different fate from those other, less intelligent woodworkers. I was wrong. And I used the only scrap pieces I had left of the 2x material that would make a good sized block that wouldn't require a ton of sawing and planing and work.
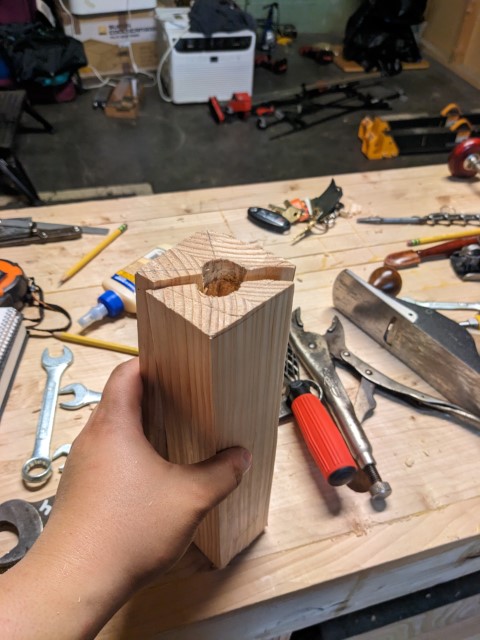
Why did I end up splitting my block? Simply put, I did not stop and think before I started drilling out the hole in the block. The planing stop has a tapered wedge shape on the bottom which goes into the wood block to be held in place. My stop also has little pointy bits that stick out along the tang that help it seat and stay in the block once it's been hammered home (what are the technical words for these parts? To me, they look like thorns on the stem of a rose, so I guess that's what I'll call them?). So the goal is to drill a tapered hole into the wooden block that will take the planing stop, that isn't so loose that it just falls out, but isn't so tight that hammering the stop down will split the block.
So, my thinking was, I'll drill a deep, smaller diameter hole into the wood, then drill gradually larger diameter holes shallower into the wood, to slowly make a cone like mortise into the wood. Then I could hammer in the stop and be done. However, auger bits are not the same as power drill bits. You can push around a power drill bit in a hole and kind of force your way into making a cone, and you can drill a small hole, and increse the size of the drill bits and force your way through. An auger bit for a brace, however, gets is boring power from the lead screw. The screw pulls the bit in, which allows the cutters to slice through the wood. If you drill a small hole in the middle, you remove the one place that is required for your lead screw to function, which is required for the bit to function.
So, I, being unable to admit my mistakes, and not stopping to consider just flipping the wood around and trying again from the other side, forced my way through with power drill bits, that were unable to go deep enough and be wide enough for the stop. I took my hammer, whacked the thing in, and it got stuck halfway through. I could not pull the thing out, because of the "thorns" I mentioned earlier, and I realized I was screwed. I had to split the block to get the stop back out to try again. So I just wailed on this thing with a metal hammer that definitely bent the stop (which I was able to mostly fix later, though it remains a little deformed), until the block exploded. It was very annoying.
I was undeterred, however, and made a trip to the hardwood supplier to buy some offcut blocks for cheap, which I then painstakingly ripped and crosscut to the right approximate size. I had no idea what kind of wood I was working with as I just pulled a nice, straight grained looking block out of a big tub, but once the shop started to smell like BBQ, I figured I was working with hickory. That stuff is hard, and I had to fiddle around with my hand planes and try different directions on the wood to actually produce a shaving, but I was eventually able to make a new stop, and drill the holes starting with the largest bit and going down in size, so that there was always material for the lead screw to pull the bit in.
My new method worked and I now have successfully made and installed the planing stop. There is a cosmetic issue, which is that the large hole I drilled is way too big and it looks very goofy and sloppy, but whatever. It works. That has been my focus this entire time working on this bench, and the fact that I can use the stop and it actually works in keeping boards steady while I plane the faces of boards means I am victorious. Humbled, but victorious nonetheless.
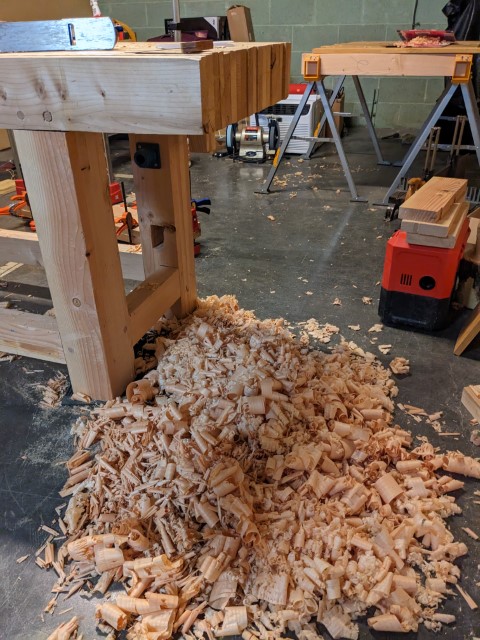
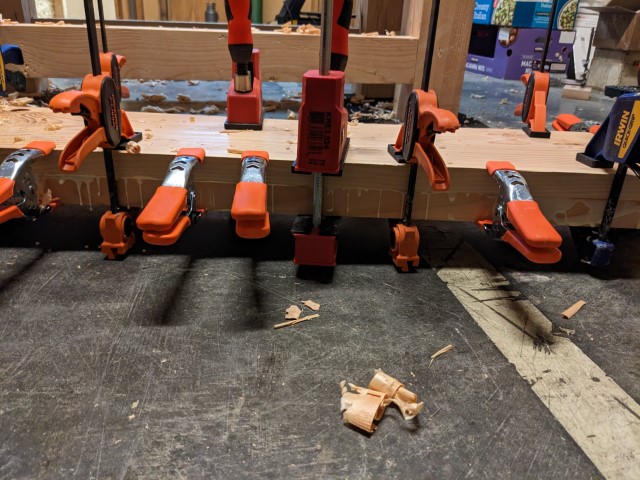
Hoo boy, the leg vise. What a doozy. After buying a new 2x10 and cutting it in half, I planed and glued up the laminations to make a sufficiently thick chop. I am starting to get really sick of working with my not-very-sharp planes and very soft construction lumber, however. The tearout with these sawing, chiseling, and planing operations is disgusting. Literally, it looks disgusting seeing huge chunks fly out with an errant whack of a mallet or a slightly too hasty swipe of my jack plane. I wince every time it happens because I know I will be looking at that broken chunk for the rest of my life.
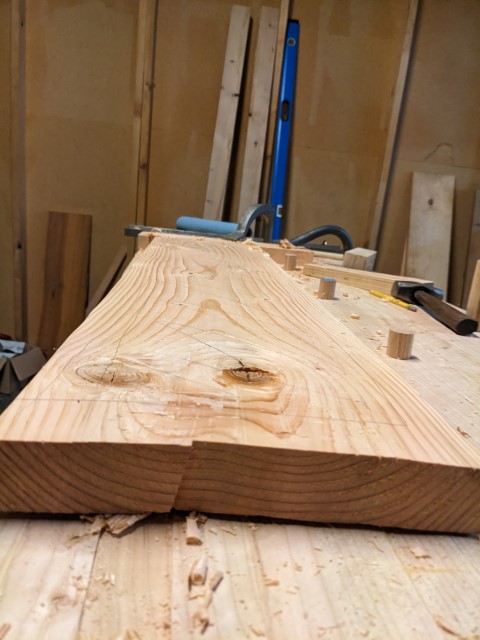
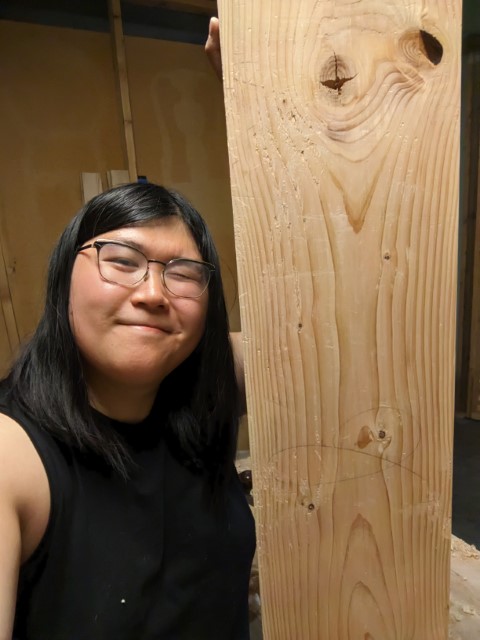
You can see how cupped the board is in the first picture above. The second picture is less clear but I think I looked cute so whatever. And you can see how many shavings come off of just one face of one of these boards. After this, it was time to drill a bunch of holes...
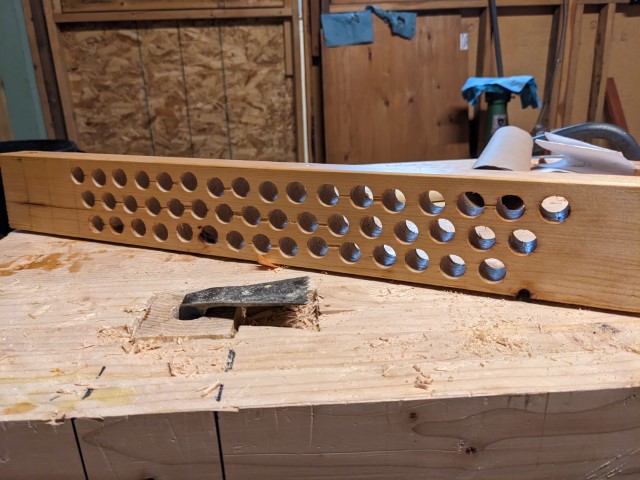
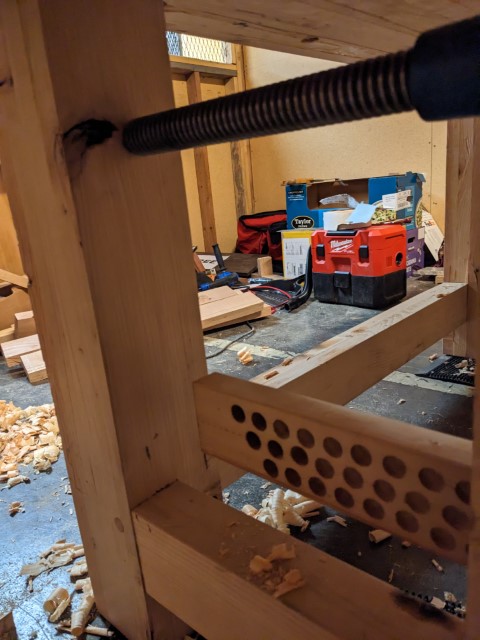
What is this board for, you might ask? Well, a leg vise is a long piece of wood that clamps at the very top. If you just had the screw to apply the clamping force, all the length and weight on the bottom of the vise would rack and weaken the grip at the top, making it a very ineffective means of holding the work. You need some way of forcing the chop of the vise to remain parallel. There are super fancy hardware kits that will give you a beautiful modern vise that opens and closes quickly and smoothly, and has perfect parallel-ness to it. But I didn't buy one of those because they are like $200. So I made this, which is a pin board. This is the old school way of setting up a vise, where this board goes in the bottom of the vise and into a separate hole in the leg. You stick a peg in one of the holes that's close enough to the distance the chop will be from the leg, and then as you tighten the vise screw, the pin will keep the leg parallel and prevent racking. It was a bit tedious, but drilling these holes is actually very satisfying to do with a bit and brace, and also this was probably the most visually pleasing part of the whole vise build. It kind of all goes downhill from here.
So I laminated the chop, cut out some of the material to lighten it up and make a more pleasing shape, beveled the top outside face like I see all the other leg vises do, chopped a mortise for the pin board, and drilled a hole for the screw. Then, I fit the screw into the chop, glued up the pin board into the corresponding mortise, and was very proud of myself...
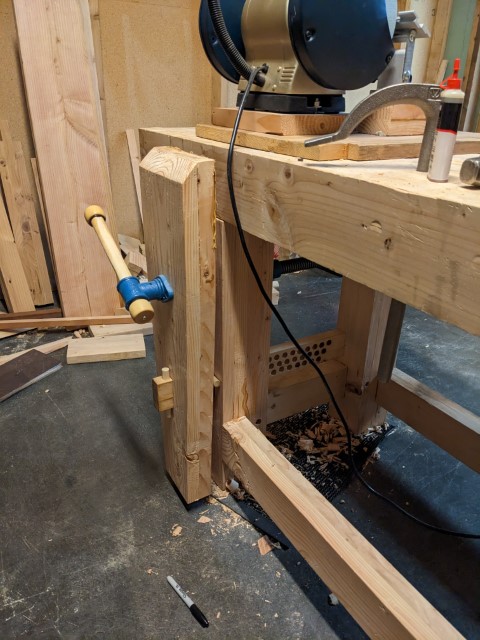
But once the glue set, I immediately realized an issue. I was so used to chopping mortises into my workbench, where the mortise is just the same dimensions as the tenon going in (because for the benchtop legs, there are shoulders glued on that are just separate planks of wood laminated together) that I didn't think about how I should definitely not do that for the pin board. This is because, unlike my legs in the benchtop, the pin board does not have any shoulders, and it will have stresses pushing it forward through the chop as it's bracing the vise to prevent racking when clamping something. I put a pin in the front, then realized how stupid this was, as the force is not going into the leg. So at some point, I fully expect this pin board to explode out the front of the vise, and then I will have to do some Frankenstein bullshit to add shoulders to it (probably I will just glue a strip of wood on the top and bottom edges of the pin board, and cut the mortise in the leg a little longer, so that it can fit the now taller board).
Once I glued in the pin board and got over my despondence about its inevitable structural failure, I screwed in the leg vise and found a small issue, and a big issue. Small issue first, the handle that came with the vise is somehow too thick! That was very annoying to me, I ended up putting it in the vise later and cutting some relief cuts with my drawknife to get it to more smoothly fit. Again, it is ugly as sin, but it works.
The larger problem came when I tried to close the vise all the way, and it suddenly stopped. Confused, I tried turning it harder, since maybe there was something wrong in the threads. Then I broke out in a cold sweat and looked under the bench to confirm my horrifying suspicion. The vise screw is too long, by about 2 inches. Remember what I said earlier about my cart-first approach? I bought the screw before drawing up my plans about the bench, and even afterwards, never really considered the actual clearance I would have for it. I just picked the middle size of the 3 sizes, because that seemed like a good middle ground. I ended up drilling another hole through the back leg to accomodate the extra length (and it had to be through the leg, because the distance inside the legs is too short for me to fit my big drill into). Truly a nightmare.
But, after gluing some leather to the inside of the chop, the vise is done, and it works beautifully. The planing stop is gross looking, but that works too. Finally, I can say the bench is completely done.
...Except for the shelf I want to add to the bottom. But it's done, god damn it!