The last couple weeks in the shop have felt like two steps forward, one step back. Yes, I've made a lot of great progress. I'm in the middle of milling all the various parts for a simple sawbench design I want to make that draws inspiration from the Chinese "4 leg 8 splay" pattern. I've sharpened a lot of tools. I've applied a coat of tung oil to the benchtop to give it a nice, finished look.
And yet, in all of these tasks I have made huge mistakes one way or another, and at times it has been downright heartbreaking. If you are reading this and embarking on your own woodworking journey, may these mistakes inspire you to learn and make different ones.
I think I may have hit the end of my Christopher Schwarz obsession (ignore the fact that I am a paid subscriber to his Substack The American Peasant). During a surprise trip to the Highland Woodworking store in Atlanta, Georgia, I picked up a copy of Sharpen This, a little handbook with a simple guide to sharpening all the tools you use in the shop. Schwarz writes about how he never thought he would ever write this book because sharpening is so straightforward and simple, and people get way too high off their own farts about all the fancy tools and jigs you can use for sharpening. This part makes sense, and I agree with him, and the techniques in the book about honing on whatever honing medium you use (I have some cheap diamond plates recommended by Paul Sellers on YouTube) are excellent. I have no issue with these methods and using the sharpening jig has given me a more consistent approach to sharpening.
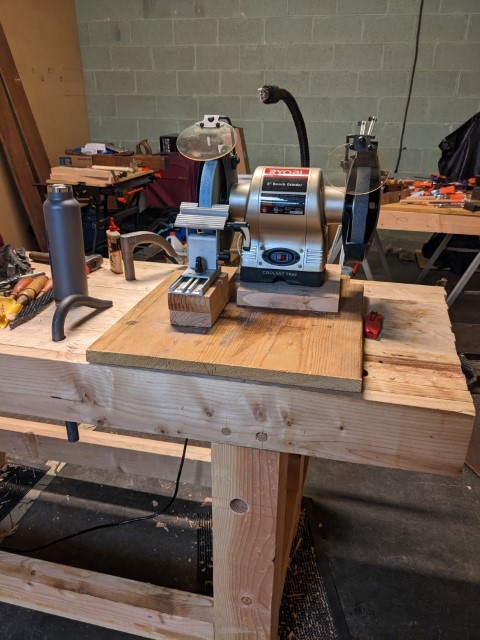
What I was not prepared for was the section on grinding. I am terrified of most power tools, which is why I am a hand-tools-only kind of girl. But a bench grinder seems straightforward and simple. There's no blades, you wear goggles and ear protection (and a mask I later learned. Definitely wear a respirator. Your lungs are essential!). And grinders are pretty cheap and easy to get. In fact, I was thrilled to score a nice, never used 8" grinder and stand for $80 on OfferUp. My journey to grinding nice, cambered jack plane irons was well on its way!
But there's a couple problems with bench grinders, which I greatly underestimated. They throw off a lot of shit. They're loud and scary. Theres a lot of metallic waste material being thrown around everywhere. If you're using a friable grinding wheel (which you should, as you can dress the wheel to have a convex shape and give yourself more control when grinding), the wheel also throws of gritty little specks everywhere. In a confined shop space where there's a lot of tools and wood and sawdust everywhere, it's not an ideal place to also add a powered, high speed grinder into the mix. In short, it's a mess.
But more than it being a mess, it's actually hazardous to mix metal dust from the shavings of the grinder with sawdust from cutting wood. It's not guaranteed, but you create a spontaneous combustion risk from these two things mixing together, especially if you vacuum it all up in one vacuum like I did.
Furthermore, I did not wear a mask while grinding and had a stuffy nose and cough for a couple days. You definitely need to wear a respirator when creating metal dust with a grinder. It seems obvious, but when you're in that groove state, just getting shit done in the shop, it's easy to overlook something in the sake of just getting more work done.
I gave myself a panic attack and had to stop and deep clean my shop floor and vacuum to eliminate any risk that I would burn down the building with my mistake, and I spent way too long googling symptoms of lung cancer during my stuffy nose period. The grinder is a scary tool and you have to treat it with respect, like every other tool in the shop, and I stupidly forgot that part. At least I was able to sharpen all my stuff correctly, right?
Right?
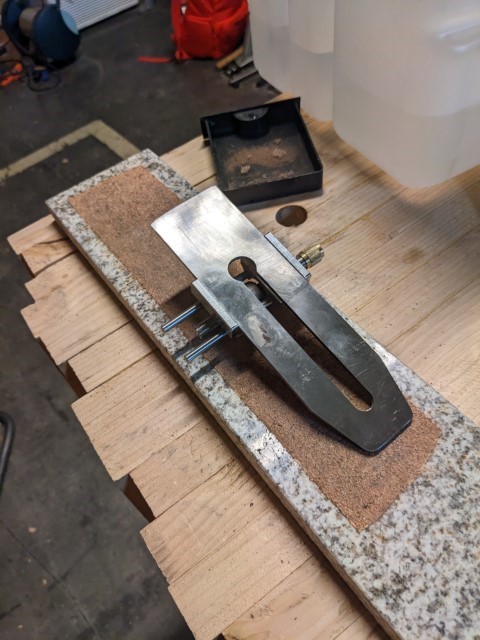
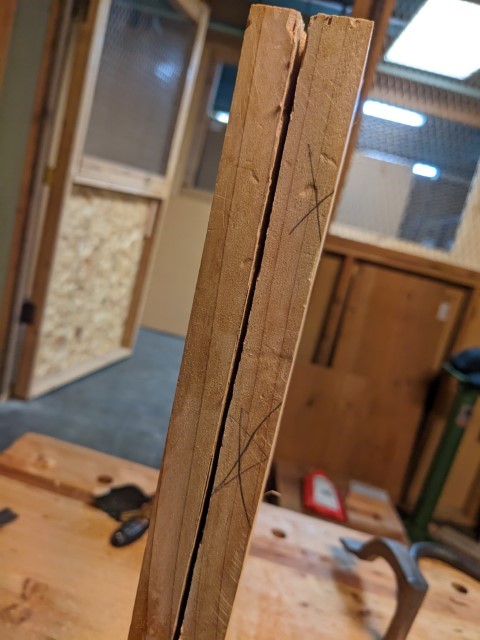
Ok, let's talk about tool rests. One thing that I just did not internalize from the Sharpen This book is that to get the right bevel angle when grinding, you need to have a tool or template with the bevel you want and adjust the tool rest until that bevel hits the grinding wheel at a tangent to the surface. Basically, you have a thing with a bevel at, say, 25 degrees. You adjust the tool rest with the tool on top until that bevel sits flat on the wheel when it's not moving. Then when you actually grind the thing, you know you're grinding the face properly.

I did not do this. I assumed that if I had a protractor, I could just adjust the tool rest to the angle I want the bevel at, and that will make whatever I grind at that angle. This is a stupid thing to do and nowhere in the Sharpen This book does it instruct you to do this. I read the book and completely ignored the procedure outlined to me because I thought I knew better. Doing it my way results in some crazy angle like the one you see above, because the chisel itself has a bevel and you're not grinding perfectly flat and square stock, so the result is an angle much too blunt to be useful. Even worse, I suspected something was wrong with my process, but instead of completely stopping, reconsidering the text, and learning how to do it the right way, I just fiddled and made a mess and got really frustrated.
Do I wish there was a section of the book that was just, "these are some common boneheaded mistakes you may be tempted to make"? Yes. But would my mistakes even be in that section to begin with? I don't know. Would I have even understood them if I had read them? That's unclear. I think I may just be really bad at reading instructions from books.
So not only did I inhale a bunch of shit I didn't want to inhale and make a horrible, dusty mess on my shop and bench (by the way, a nice side effect of doing this before I applied a finish to my bench is that the metal oxidizes the tannins in the wood, which caused some nice, gray-black streaks in the benchtop. Very nice.), I also ground an improper angle on most of my chisels, many of which are nice timber frame style chisels I won at an auction at the tool collector's meeting. It's not the end of the world, I can always regrind them, but I don't think I'll be using the grinder again inside my shop, and it meant I spent a lot of time at the honing station re-grinding the bevels on a couple of the more important chisels by hand. It was a complete disaster.
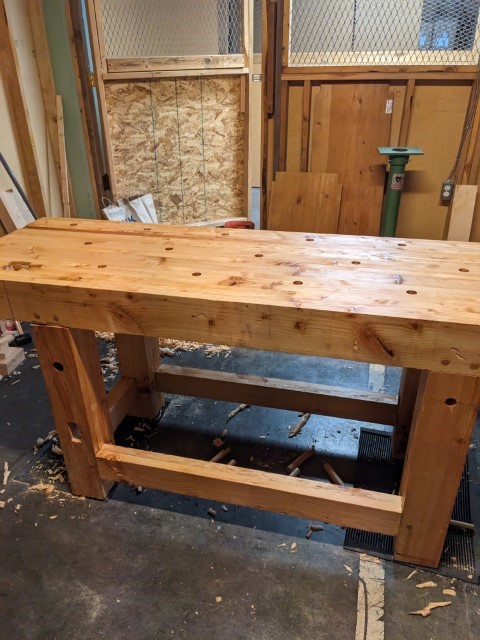
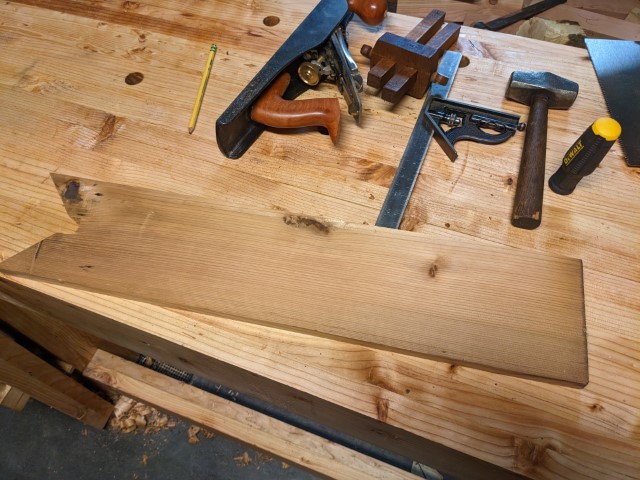
As a pick me up, I decided to apply a finish to my bench top after my horrible experience with the grinder. I bought a big jug of pure tung oil to do this and it worked great. I watched a Stumpy Nubs video about tung oil and used his technique, which is basically just flooding the surface with oil, letting it soak in for a couple minutes, then wiping up all of the excess until it feels basically dry to the touch. Then let the oil cure for a few days. Many of the tung oil products on the market have drying agents to accelerate this process, but natural tung oil needs to cure for a long time before you can add more coats. I am not sure I even want to add more coats since it's not exactly super needed, and the oil is just there to help prevent glue from making a mess on the benchtop once I get to actually assembling furniture.
I made a big mistake in this step, however, which was not taking enough care to prevent oil from going into the holdfast holes in my bench. Ideally you do the finish step before you drill all the holes in the benchtop, but I was in a hurry to start working and did not do this. If you do get oil in your holdfast holes, you will negate the effectiveness of your holdfasts entirely as they rely on friction and tension to hold down your work. I spent a couple hours soaking rags with mineral spirits and plugging and scrubbing the holes in my bench. The good news is that this worked, and my holdfasts work again, but it was slow and another example of a hard lesson learned after trying something without much thought.
I should be more generous with myself, I am brand new to so much of this stuff. I never took a shop class in high school, my dad is pretty handy but he mostly just screws store bought lumber together to make simple structures, like the chicken coop and enclosure in his backyard. This is a learning experience, which means learning what I don't know I don't know. Now I know better.
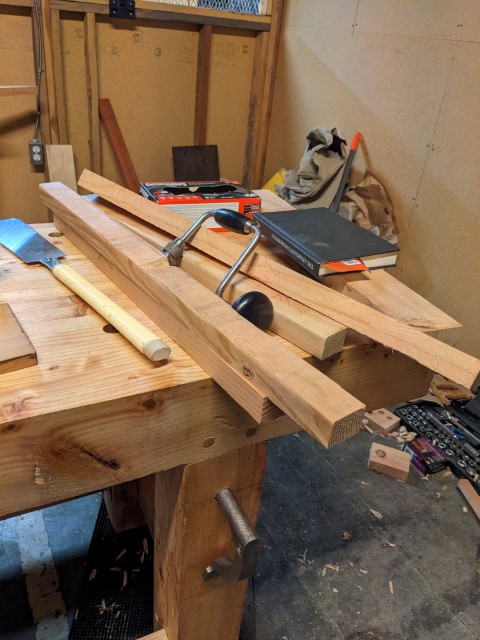
A sawbench is the final piece of shop furniture I think is essential to continuing my work. After this, I would like to start making some actual furniture, and now that I have a surprise move coming up in a few weeks, it seems like a good chance to actually make something to replace the awful Ikea stuff I have in my house. If you don't know, a sawbench is basically a knee-high bench that you use with a hand saw to cut wood. Why is this specific bench useful? Because it being knee high means you can put the board on top, put your body weight down on it with your knee, and then saw in a more ergonomic and stable way. Taking saw cuts away from the workbench also helps keeps things tidy, so you don't have piles of sawdust to clean up on your bench. The bench then becomes for planing and chiseling, the sawbench for sawing, and everything is happy and nice. And my need for a sawbench actually revealed itself to me in the most horrible and painful way.
I am actually too heartbroken about this part to show you a picture. Since I don't yet have a sawbench, right now I am forced to clamp all the wood I'm milling in the leg vise and make all my rip cuts vertically in the vise. I had to make 2 rip cuts down some long pine stock I had leftover to eventually make the 4 legs. My rip saw is 4 TPI, so it's extremely coarse and hard to saw when you don't have gravity to help you like you would if ripping on a sawbench. What this means is that my current process of ripping boards causes my bench to rock back and forth, which will cause whatever is on top of the bench to jostle around and potentially fall. My Stanley #7 try plane was sitting on the bench top as I had just finished using it to flatten a different board that will become the sawbench top.
So, there I was, struggling with starting the cut on this vertical board, when suddenly....
It could have been a lot worse, to be honest. The bed of the plane is fine, the blade and chipbreaker and cap iron are fine. The frog is busted, a piece of it broke off and the adjustment lever snapped as well. In theory, I could probably buy a replacement frog online and tune my plane back up and get it working again. It wasn't the most beautiful plane in the world, I got it cheap on EBay because a chunk is missing on the side face of the plane from when it was dropped previously. So, I guess, this guy is probably used to hitting concrete. It still killed me inside, though.
I have a 24" wooden plane that I want to fix up soon, it just needs a sharpening and a flattening of the sole before it can be usable, and it will give me a good excuse to set up my smoothing plane. But, still, this one hurt me deep in my soul.
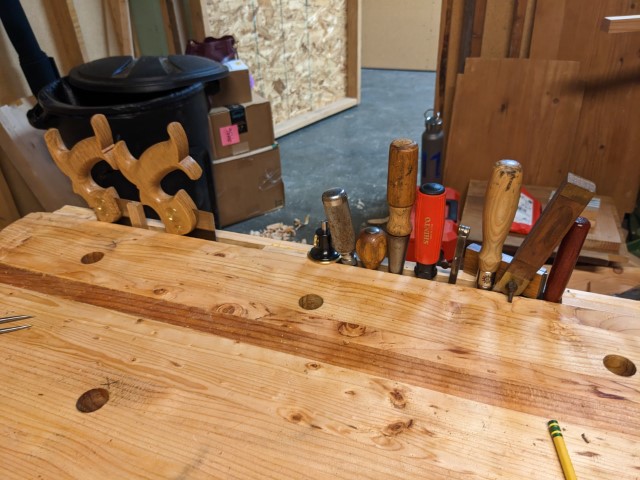
Time to give myself credit where credit is due. I installed the tool rack on the back of the bench after all the mineral spirit stuff, and it turned out amazingly.
I was very successful in resawing some pine scraps to make this and I think it looks pretty slick. With the tool rack, I should have much less issue of tools rolling around and falling off the bench (in fact, the marking gauge in there is awaiting replacement cutters as it rolled off one day and the cutter split in two).
I also made this! It's called a doe's foot, and it's a clever little jig that helps keep boards from racking and wiggling around when traversing with a hand plane (or really when planing at all). The idea is to use this in tandem with a planing stop. By having one end of a board against the stop, and the opposite corner held in the foot (and the foot held down tightly with a hold fast), you can plane in whatever direction you need without the board jumping and twisting around on the benchtop. I made this with a scrap of wood I found lying around in the building I rent from. This piece used to be a shelf for a very flimsy bookshelf, I think? It was covered in a thin layer of brown paint. As I planed it off, it smelled amazingly sweet, and for a second I was worried this was lead paint, since I have read that lead paint chips taste sweet. But the color was so thinly applied and came off so easily with the plane I could barely call it "paint", and even after the color was gone the wood gave off a beautiful, sweet smell. Judging by its appearance and from what I've read online, likely this is a very old piece of cedar. I am extremely pleased to give this wood that was otherwise destined for the incinerator a new life as a shop jig I look forward to using.
Finally, I found this outside of my door a few days ago on my way in to the shop.
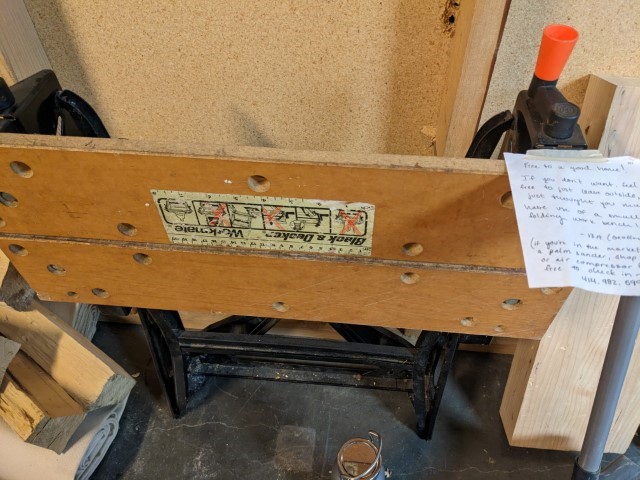
It's not exactly an accomplishment to receive a gift, but it feels good to be noticed. Lots of people in nearby units have popped in to say hi and I've met a lot of friendly folks who are all interested by the work I'm doing. This person gifted me a Workmate and it immediately became useful as the staging area for my mineral spirit cleanup operation. I have another workmate that is nasty and covered in grit, as it is my primary sharpening station, so a new, clean surface is much appreciated.
All in all, it's been a challenging couple of weeks, but still deeply rewarding. Learning any new craft or skill comes with a lot of painful mistakes and lessons, but in the end, you can still accomplish some pretty cool things, which makes all the mishaps worth it. I am still really sad about my Stanley #7, though.